You love impressive, easy-to-make party food but shy away from fussy baking. How to Make Focaccia Bread Art solves that: a forgiving dough that turns into edible, picture-perfect bread that wows guests. This guide shows you how to shape, dimple, and decorate focaccia so each loaf looks like a plate you’d pin.
The secret? Weigh ingredients with a digital kitchen scale for consistent dough, and save time by using a stand mixer if you prefer hands-off kneading. Both make How to Make Focaccia Bread Art feel reliable, especially when you’re trying new designs.
You’ll learn exact measurements, realistic rise and bake times, 4 creative topping patterns, and quick troubleshooting so you can make focaccia that’s both gorgeous and delicious.
Preparing Your Ingredients
visible. Same lighting and minimalist props. 60 words]
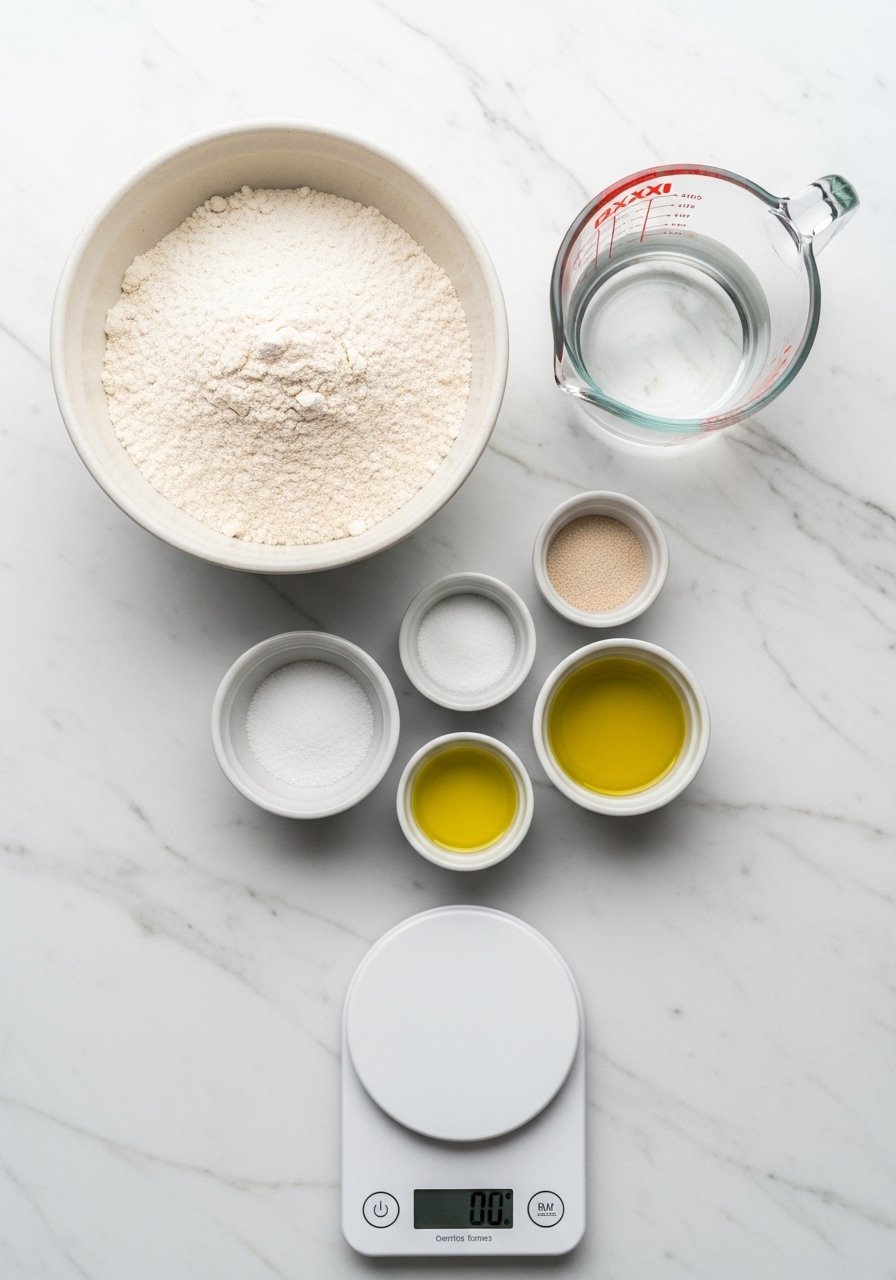
Start with: 500 g bread flour, 350 g lukewarm water (70°F–90°F), 10 g fine salt, 7 g instant yeast, and 30–45 mL olive oil. Use a digital kitchen scale for accuracy—cups vary too much for consistent focaccia.
- Mix dry ingredients in a large bowl or in a stand mixer fitted with a dough hook.
- Add water and oil, then knead 5–7 minutes until smooth.
- If doing a hands-off approach, use a stand mixer on low for 4–5 minutes.
Tip: If the dough is sticky, coat your hands with oil rather than flour so the final texture stays light.
Mixing, Bulk Rise, and Folding
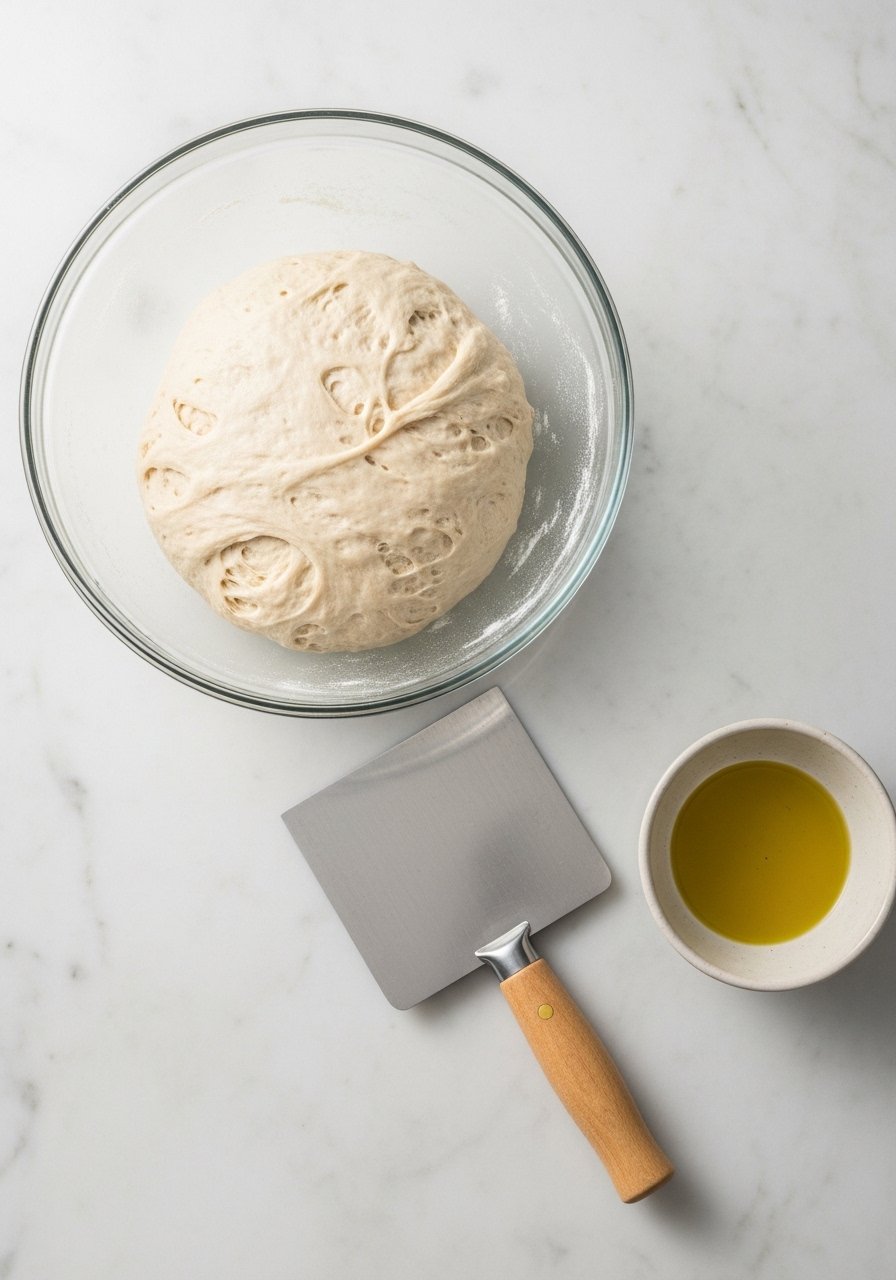
After mixing, transfer dough to an oiled bowl for bulk rise.
- Lightly oil the dough surface and bowl.
- Let rise at room temperature 1–1.5 hours until doubled, or refrigerate 12–18 hours for more flavor.
- Perform one gentle fold halfway through the rise to build structure—use a bench scraper to handle sticky dough cleanly.
Folding saves time and creates airy holes without extra kneading. If you refrigerate overnight, plan to remove dough 60–90 minutes before shaping so it relaxes.
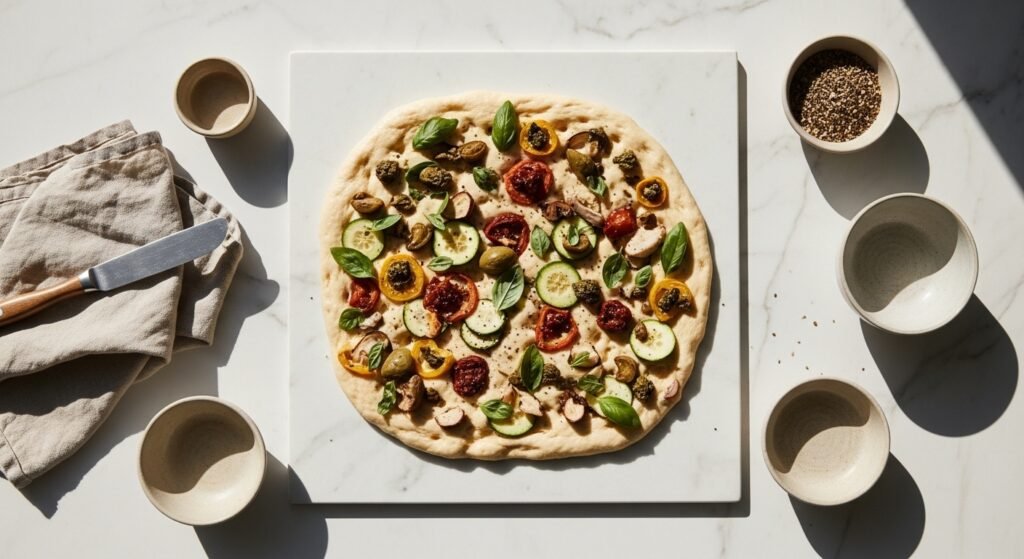
Shaping and Creating Focaccia Bread Art
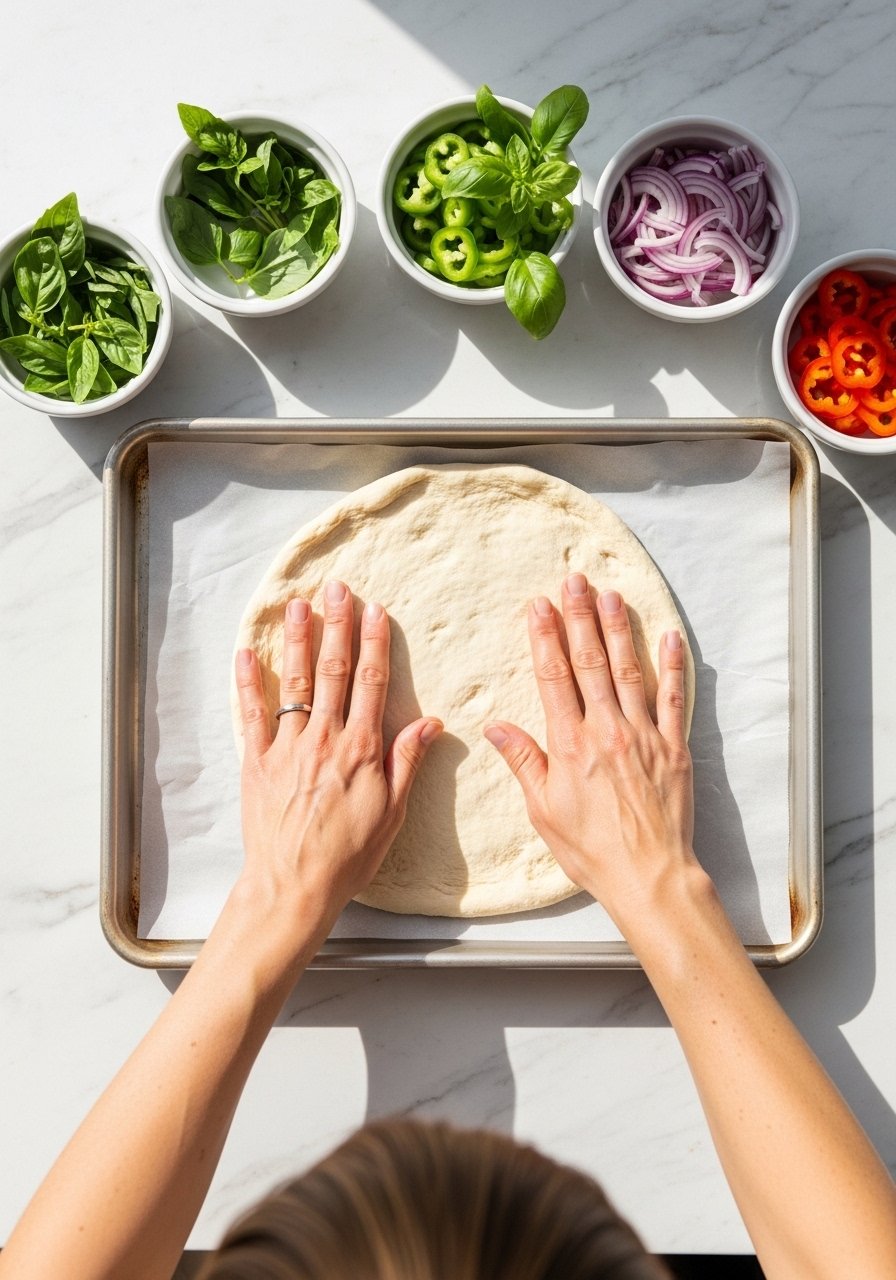
Gently stretch your dough into a well-oiled 13×18-inch rimmed baking sheet—it keeps edges crisp. I use a rimmed baking sheet lined with parchment paper so focaccia lifts easily.
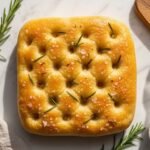
- Press with your fingertips to create deep dimples—these hold olive oil and toppings.
- For floral focaccia art: slice cherry tomatoes, use rosemary sprigs for stems, and thinly sliced onions for petals.
- Use an offset spatula to even out the dough edges and a pastry brush to coat with oil.
Numbered pro-tip:
- Arrange vegetables on the dough before the final proof.
- Let the topped dough proof 20–30 minutes while your oven preheats to 450°F.
Baking, Checking Doneness, and Serving (easy crust tips)
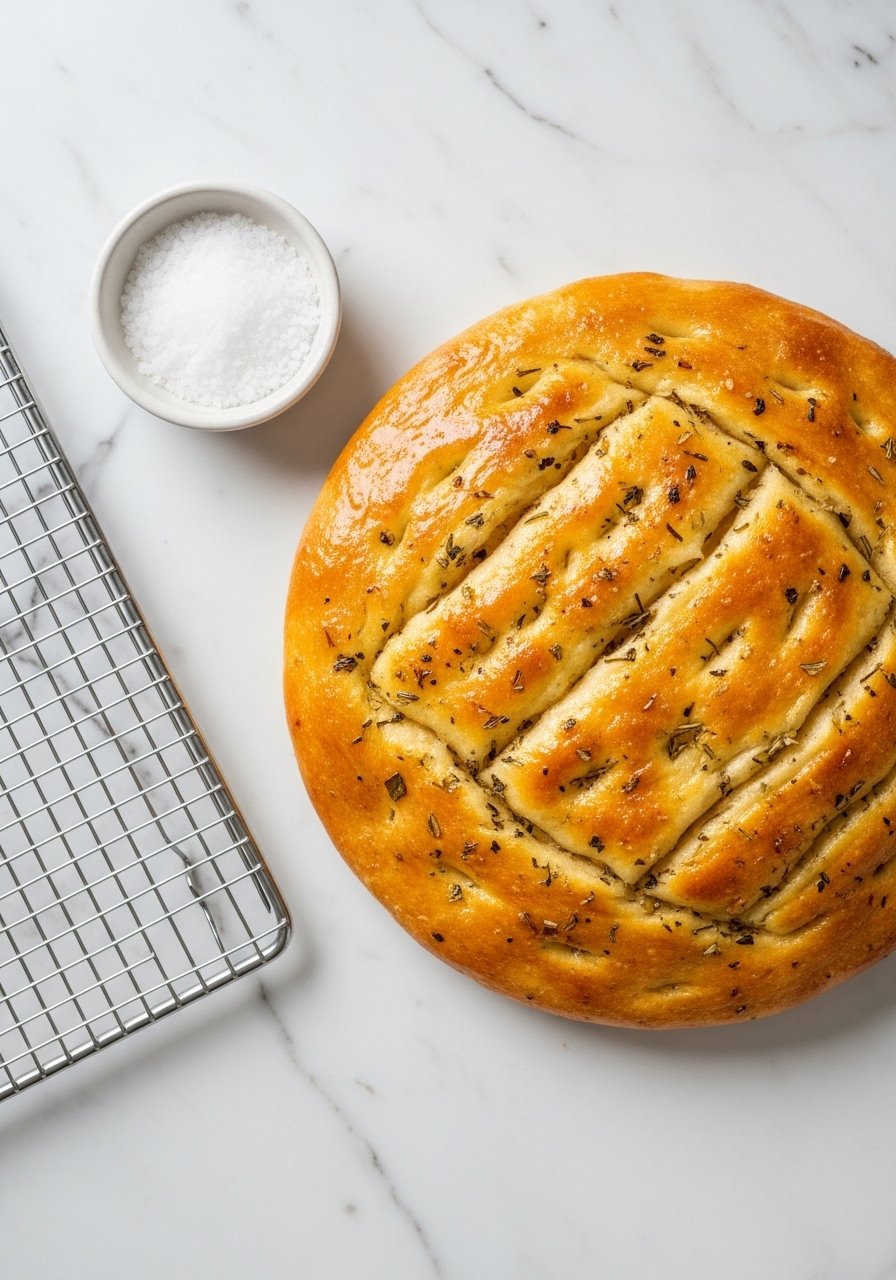
Bake at 450°F for 18–22 minutes until golden and the edges are crisp. An instant-read thermometer should read 200–210°F in the center for fully baked crumb.
- Use a silicone baking mat under parchment if your sheet warps.
- Transfer to a wire cooling rack right away so the bottom stays crisp.
Store leftovers in airtight glass containers at room temperature for up to 48 hours, refrigerate up to 4 days, or freeze slices flat in labeled freezer bags for 3 months.
Final presentation tip: sprinkle flaky sea salt and finish with a drizzle of extra virgin olive oil right before serving for glossy, photo-ready results.
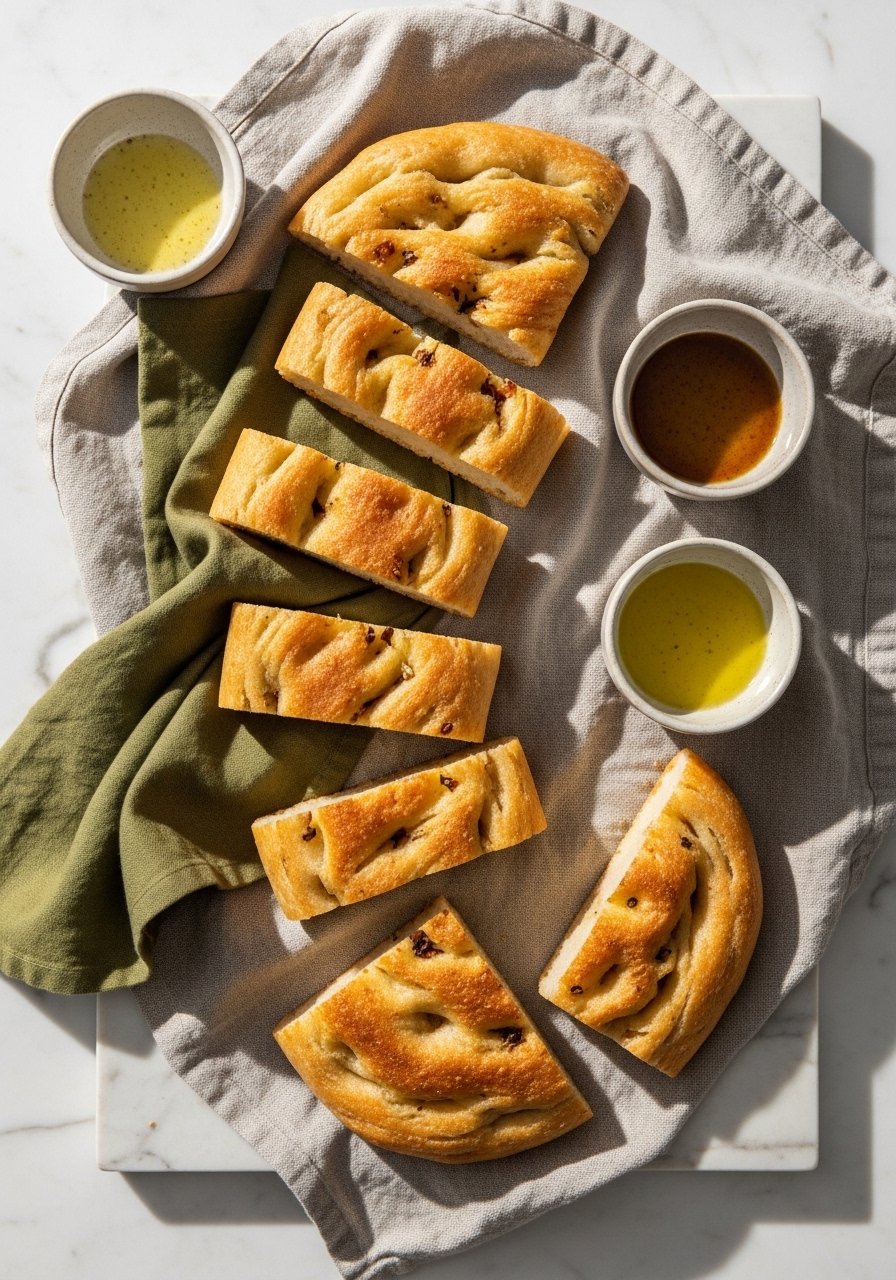
This approach to How to Make Focaccia Bread Art gives you clear measurements, realistic timing, and practical fixes so each loaf is edible art your guests will remember. Save this guide, pin it for your next gathering, and share a photo when you try a design—what topping pattern will you make first? If you want consistent results, grab an offset spatula for shaping and a digital kitchen scale to repeat the recipe every time. Pin this guide for your next baking session!